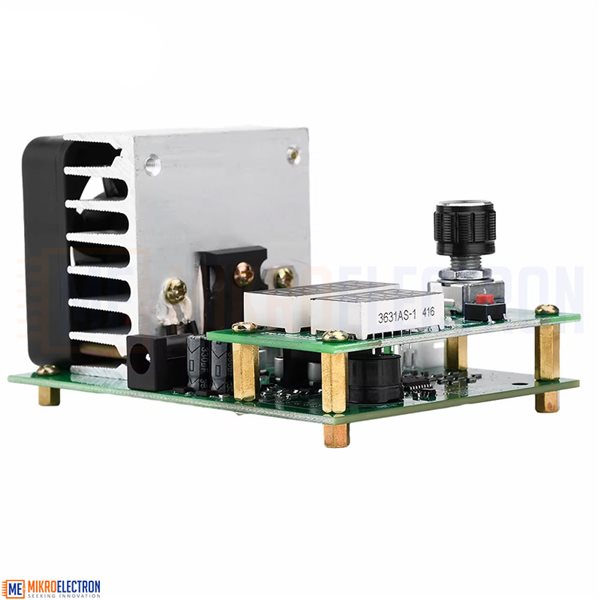
9.99A 60W 30V Constant Current Electronic Load Discharge Battery Capacity Tester


Description:
Made of high-quality materials, long service life, high-quality circuit, stable performance and high efficiency.
Reverse connection protection: with reverse connection protection, even if the wire is connected in reverse, it will not be damaged.
With fan control: intelligent fan control (the fan can automatically change speed according to the radiator temperature).
Protection function: overheating protection "otP", instantaneous overpower protection "oPP", overvoltage protection "ouP", reverse connection protection, power supply voltage abnormality protection.
Wide range of applications: can measure the actual capacity of the battery, test the actual power of the load, etc.
Add support for four-wire testing in electronic load mode, with independent four-wire voltage indicator light.
Product parameters:
Working power supply: DC12V regulated voltage (11-13V) not less than 0.5A, if the power supply is not suitable, Err6 will be displayed
Interface: 5.5*2.1mm round port with positive pole
Working mode: single mode constant current (CC)
Discharge current: 0.10 - 9.99A step 0.1A or 0.01A
Discharge current error does not exceed: 0.7% plus or minus 0.01A
Capacity test error does not exceed: 0.5A 2%, 2A 1.5%, 5A and above 1.2%
Lower limit (termination) voltage setting range: 0.9-28.0V step 1V or 0.1V
Discharge voltage: 0.90-30.00V (affected by MOS internal resistance and other losses, the measured input 1V can support 6-7A current, and the measured voltage needs to be greater than 1.3V at 9.99A)
Voltage measurement error does not exceed: 0.8% ±0.02V
Power: 112W Overpower automatically limits current (e.g. for 110W, 9.99A can be opened at 11V and only 5.5A can be opened at 20V)
Power: 62W Overpower automatically limits current (e.g. for 60W, 9.99A can be opened at 6V and only 3.00A can be opened at 20V)
Battery test statistical value limit: 999.9Ah or 9999Wh, the test stops when the value is reached (whichever value is reached first is the stop condition)
Product size: 110W: 122mm*70mm*77mm (the fan protrudes from the board by about 22mm)
60W: 106.5mm*70mm*57.5mm (the fan protrudes from the board by about 12mm)
Positioning hole position: 60mm*88mm Hole diameter 3.2mm 5mm pad column installed (60W is copper column 110W is an insulated nylon column)
Operation instructions:
1. Function mode setting (default factory setting is electronic load mode): Press and hold "ON/OFF" to power on the tester, and release the button until Fun* is displayed. At this time, enter the function setting menu. Change the setting by rotating the knob, and switch to the next step by pressing "ON/OFF". Set in the following order:
1. Mode setting "Fun1" is electronic load mode, "Fun2" is battery capacity test mode.
2. Buzzer switch setting "bEon" buzzer on, "bEoF" buzzer off.
3. Display brightness setting "Lt-1" "Lt-2" "Lt-3", three brightness levels are optional. After completing this item, press "ON/OFF" again to save and exit the setting. Then the tester restarts and enters normal working state.
2. Electronic load mode:
1. Connect the 12V working power supply and turn on the machine. Make sure it is in the stopped state (the "RUN" light is not on, otherwise press "ON/OFF" to turn it off). Connect the power supply under test to the power input port (P+P-). If you use the four-wire connection method, please connect the voltage detection line to the (V+V-) socket at the same time. If the voltage of the power supply under test is higher than 1V, the voltage will be automatically displayed. When it is identified as a four-wire mode, the "L-4" light will light up. Note: Do not touch the radiator with the screwdriver when wiring, and do not connect the negative pole.
2. Set the current and lower limit voltage through the knob. Rotate the knob to set the value of the current setting position. Press the knob to switch the setting digit. The number of the current setting position will flash. If there is no operation for more than 3 seconds, it will automatically exit the setting and return to the normal display of voltage and current.
3. Press "ON/OFF", the load starts to run, "RUN" lights up, the circuit applies the set discharge current to the input power supply under test, and the upper line displays the actual input load voltage. When the voltage is lower than the set lower limit voltage, the "RUN" light flashes and the buzzer alarms shortly.
4. The current can be modified at any time during the test process. If you need to modify the lower limit voltage, you must first turn off the load before modifying it.
Note: When in alarm state, the current can only be adjusted down but not up! The automatic power-off saving function of the tester can save the set parameters and operating status. When the power is off and then re-powered, the status and data before the power outage will be completely restored.
III. Battery capacity test mode:
1. The battery to be tested should be fully charged with a dedicated charger first!
2. Power on the tester to enter the battery capacity test mode, connect the positive and negative poles of the battery current line to the P+P- terminal. If a four-wire fixture is used for testing, please also connect the positive and negative poles of the four-wire fixture voltage test interface to the V+V- port. The tester will display the battery voltage. If the four-wire voltage test line is connected correctly, the "L-4" light will light up at the same time.
3. Set the discharge current and discharge termination voltage by rotating the knob (refer to 2: 2. Description for specific methods). After setting, press "ON/OFF". The tester first detects the battery and circuit, and then enters the test. If a fault code appears, please refer to the following instructions.
4. During the test, the uplink digital tube will rotate to display the battery voltage, current discharge capacity Ah and current discharge energy Wh. When the discharge is completed (the battery voltage is lower than the set voltage), the tester display data stays at Ah and flashes quickly, accompanied by a rapid buzzer alarm.
5. Press the knob or the start-stop switch to stop the alarm. You can view the battery discharge data including discharge capacity Ah, discharge energy Wh and platform voltage V by rotating the knob. After pressing "ON/OFF" again, clear the data and restore to the initial setting interface before testing the next battery.
Additional instructions:
1. The discharge current can be adjusted at any time during the battery test. If you need to readjust the termination voltage, you can press "ON/OFF" to pause the discharge modification (pausing the discharge will return to the setting page, and the discharged data will not be lost. At this time, long press "ON/OFF" to clear the data).
2. The tester can automatically save the set parameters when it loses power, and record all parameters and status when the power is off during the test process and the alarm state at the end of the test. All are automatically restored after power is restored.
Fault protection code and meaning:
Err1: The capacity test battery voltage is too high.
Err2: The battery voltage is lower than the set termination voltage, the battery is not connected or the battery is connected in reverse.
Err3: The line internal resistance is too large or the battery cannot withstand the set discharge current.
Err4: Circuit failure.
Po-L: The power supply voltage is too low or the power is insufficient.
Po-H: The power supply voltage is too high.
otP: Overheat protection.
Ert: The temperature probe is faulty or the temperature is too low.
ouP: The voltage is too high in the electronic load mode.
Kit include:
1 x 9.99A 60W 30V Constant Current Electronic Load Discharge Battery Capacity Tester
Related Products


subscribe to our weekly newsletter
We are an online electronics store based in Jordan-Amman. The products we sell ranges from electronic products to modules and much more.
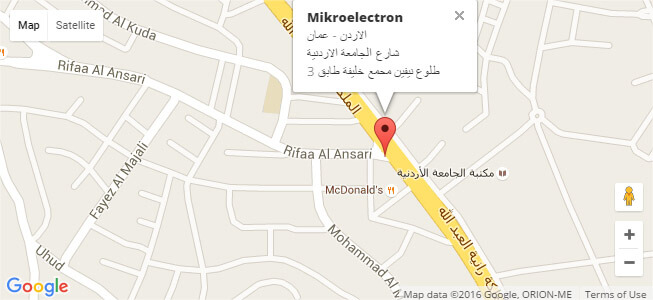
- AMMAN, Jordan. University Street, Khalifa Building 3rd floor
- Mobile: +962 7900 621 96, +962 65344772, +9627 8877 5522
- Phone: +962 6 5344772
- Fax: +96265344778
- Email: info@mikroelectron.com

2024 © Mikroelectron. ALL Rights Reserved. | Distributor Area
Made With By Tashfier.